
Shopping Cart Assembly Instructions Made Simple
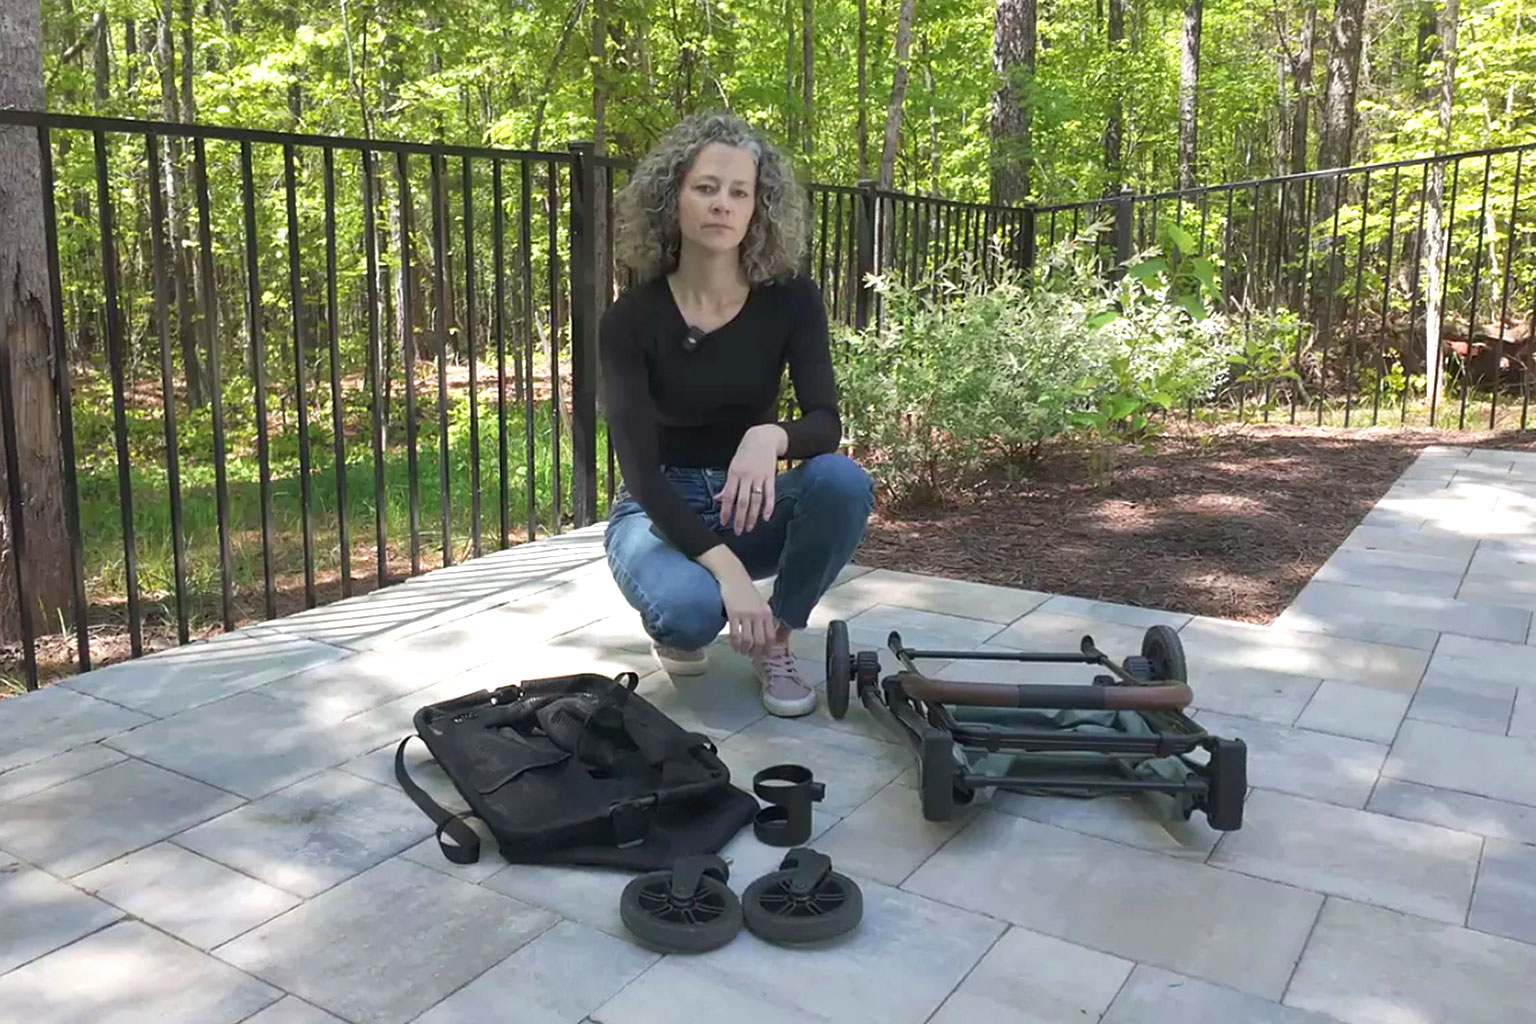
The first time you open a new cart box, the parts can look more complicated than they really are. Good shopping cart assembly instructions should do one thing well – help you get from packed box to ready-to-use cart quickly, safely, and without second-guessing every bolt and clip.
That matters more than people think. A cart that is assembled correctly feels stable, folds the way it should, and handles daily errands with less fuss. A cart that is rushed together can wobble, pull unevenly, or make simple tasks feel harder than they need to be.
Before you start the shopping cart assembly instructions
Set up in a clear area with enough room to lay out the frame, wheels, basket, and any accessories. A flat floor is best because it lets you check alignment as you go. If you assemble on carpet, small hardware can disappear fast, and it is harder to tell whether both sides are sitting evenly.
Before attaching anything, match the parts in the box to the parts listed in your manual. Most foldable shopping carts include a main frame, front and rear wheel sets or individual wheels, a basket or fabric carrier, axle hardware, and sometimes clips, caps, or accessory mounts. If your model includes add-ons like an organizer bag, insulated bag, or cup holder, keep those off to the side until the main cart is fully built.
This is also the right moment to inspect for shipping damage. A slightly bent bracket, cracked wheel housing, or missing fastener is much easier to address before you begin assembly. If something looks off, pause there rather than forcing pieces together.
Start with the frame first
For most models, the frame is the foundation of the entire setup. Open it carefully and let the main structure settle into position. Some carts click into an open shape automatically, while others need a locking bar or side support to be pushed into place.
Take your time here. If the frame is not fully opened and locked, every step after that becomes harder. Wheels may sit at the wrong angle, the basket may not line up, and folding the cart later may feel stiff.
A common mistake is assuming the frame is fully engaged because it looks upright. Instead, press lightly on both sides and check that the support points are seated evenly. If one side shifts more than the other, reopen it and try again.
How to tell the frame is aligned
The easiest signs are visual and practical. The cart should stand evenly on the floor, the handle should feel centered, and the left and right sides should mirror each other. If one side bows outward or a crossbar looks twisted, stop before adding more parts.
Minor resistance is normal on a new cart, especially with folding joints. What should not happen is grinding, forced bending, or a part that only fits if you push hard at an awkward angle. That usually means something is reversed or not seated correctly.
Attach the wheels with care
In many shopping cart assembly instructions, the wheel step is where people either move too fast or over-tighten everything. Both cause trouble later.
If your cart uses push-on wheels, slide each wheel onto the axle until you hear or feel the locking mechanism engage. Give the wheel a firm pull outward afterward. It should spin freely but stay secured in place. If it slides back off, it is not locked yet.
If your model uses washers, caps, or axle nuts, follow the order shown in the manual exactly. That order matters because it affects spacing and movement. A wheel assembled in the wrong sequence may spin poorly or rub against the frame.
Tighten hardware until secure, then stop. Over-tightening can limit wheel rotation and make the cart harder to maneuver. Too loose, and you may hear rattling or notice side-to-side play. The goal is secure attachment with smooth movement.
Test wheel movement before moving on
Spin each wheel by hand. It should rotate without scraping or wobbling heavily. Then roll the cart a short distance on a hard surface. If it pulls to one side, double-check wheel placement and frame alignment before attaching the basket or accessories.
This quick test saves time. It is much easier to correct wheel issues while the cart is still mostly bare.
Install the basket or fabric carrier
Once the frame and wheels are set, attach the storage portion of the cart. Depending on the design, this may be a metal basket, a removable bag, or a structured fabric carrier that secures to multiple points.
With a basket, line up the hooks, brackets, or slots before pressing down. If it is installed correctly, it should sit level and feel secure without rocking. Do not force a corner into place if the opposite side is still floating. Back up, realign, and attach it evenly.
With a fabric carrier, start from the top attachment points and work downward. This keeps the bag centered and helps avoid twisting. Fasten snaps, straps, or clips one at a time, checking that pockets and openings face the correct direction.
It helps to zip and unzip any storage compartments before first use. That confirms the fabric is sitting naturally and not being pinched by the frame.
Add accessories after the main build
This part is often skipped in basic shopping cart assembly instructions, but the order matters. Accessories should come last.
Cup holders, organizer pouches, rain covers, and insulated bags work best when the core cart is already assembled and standing correctly. Otherwise, it is harder to tell whether an accessory is interfering with folding points, wheel movement, or basket access.
If your cart is part of a modular system, install only the accessories you plan to use right away. That makes the first setup simpler and gives you a chance to learn how the cart feels in its most basic form. You can always add the rest once you are comfortable with opening, loading, and folding it.
For brands built around practical add-ons, including systems like Strolee, this approach usually gives the best everyday results. You get the benefit of flexibility without making initial assembly more complicated than it needs to be.
Check folding and unfolding before first use
A shopping cart is only convenient if it opens and closes smoothly. After assembly, practice the folding mechanism a few times with the cart empty.
Look for anything catching along the frame, bag, or wheel area. Sometimes a strap ends up routed across a joint, or a basket is not fully seated, and the cart will resist folding. That does not always mean a defect. Often it is just a small installation issue that is easy to fix early.
This is also the moment to check handle comfort and general feel. The cart should roll smoothly, track evenly, and stay balanced when empty. If it feels awkward now, it will not feel better once loaded with groceries or daily essentials.
Common problems and what usually causes them
If the cart wobbles, the most likely cause is uneven frame setup or a wheel that is not fully secured. Start by placing the cart on a flat surface and checking whether all wheels touch evenly. If not, review the earlier steps rather than trying to compensate by tightening random parts.
If the basket looks crooked, the issue is often attachment order. Remove it and reinstall from the top or from the primary hook points first. Small misalignments add up quickly.
If the cart does not fold properly, look for fabric bunching, accessory interference, or a locking bar that was not fully engaged during setup. Folding problems are rarely solved with force. They are usually solved by retracing one or two assembly steps.
If a wheel squeaks or resists turning, confirm that washers and spacers are in the right order and that the axle hardware is secure but not over-tightened. Smooth rolling comes from correct spacing as much as correct tightening.
Why careful assembly changes daily use
Assembly is not just a one-time chore. It shapes how the cart performs every day after that.
When the frame is square, the wheels move cleanly, and the basket is secure, the cart feels predictable. That matters when you are carrying groceries, laundry, pet supplies, or day-to-day essentials through parking lots, sidewalks, elevators, and store aisles. A few extra minutes during setup can mean less frustration every time you use it.
It also helps protect the cart over time. Parts that are installed correctly tend to wear more evenly. Folding points stay smoother, storage components sit where they should, and you are less likely to put unnecessary strain on hardware.
Keep your instructions and recheck after first use
After your cart is assembled, keep the manual in a drawer or storage pocket rather than tossing it out with the box. If you ever remove parts for transport, add accessories later, or notice something shifting after the first few errands, those instructions are still useful.
It is smart to give the cart a quick once-over after the first week of use. Check wheel security, basket attachment points, and any accessory clips. New parts can settle slightly, and a small adjustment early can keep everything feeling stable and organized.
A well-made cart should adapt to real routines, not create extra work. When assembly is done carefully, that is exactly what happens – the cart feels ready for everyday life, and you can get on with your day instead of fiddling with the setup.


